R Shiny's Core Concepts: Rendering and Outputting, Input Widgets, and Reactivity
Last updated on 2025-04-15 | Edit this page
Overview
Questions
- How do I add cool features to my app?
- How do I give my users meaningful things to do on my app?
- How do I get my app to respond meaningfully to user actions?
- How do I give users control over when/how my app responds?
- How do I give myself control over when/how my app responds?
- How is R Shiny server code different than code I may have written before?
Objectives
- Present data to users by adding a table to your UI.
- Allow users to adjust how the table looks, and give them control over when it changes.
- Define reactive context, event, event handling, declarative coding, and imperative coding.
- Explain how and why R Shiny server code executes differently than R code.
- Use isolation and observers to control event handling.
- Expand your UI’s “real estate” by adding a tab set panel.
Going from nothing to something
As we saw at the end of the last lesson, our app doesn’t look like much…yet! It is just a title (and a footer, if you added one on your own) on an otherwise empty page.
In this lesson, we’ll fix that! As we add content to our app’s UI, we’ll learn three core concepts of using Shiny to build a website: 1) rendering and outputting UI elements, 2) input widgets, and 3) reactivity.
Our app will showcase the gapminder data set, which
contains population, life expectancy, and economic data over time for
most of the world’s countries:
R
gap = gapminder
ERROR
Error in eval(expr, envir, enclos): object 'gapminder' not foundR
head(gap)
ERROR
Error in eval(expr, envir, enclos): object 'gap' not foundOur goal will be to give users interesting ways to engage with these data. As we go, imagine how you might do the same for your own data sets!
Let’s start by giving users a table with which to view the raw
gapminder data set.
If you think about it, a table is just a bunch of boxes (cells) within larger boxes (rows and columns) all within one outermost box (the table itself).
So, it makes sense that a table should be build-able in HTML, a language all about nested boxes! However, depending on the number of cells, it would require typing out a LOT of boxes to build such a table from scratch in HTML.
Fortunately, we don’t have to; we can have R do it! To build an element (like a table) complex enough that building it programmatically instead of “by hand” is appealing, and then to insert that complex element into our UI where a user can see it, we must:
-
Make (i.e., render) that element on the server side of our app.
- This involves first doing whatever “heavy lifting” is needed to assemble the underlying R object. For a table, e.g., we might use R to do some data manipulation, like joining two smaller tables together.
Then, we convert (behind the scenes) that R object into its functional HTML equivalent, a process Shiny calls rendering.
Lastly, we pass the rendered entity to the UI side. In the process, we indicate where in our UI we’d like the finished element to display, a process Shiny calls outputting.
For virtually every complex element you’d want to build in Shiny,
there is a pair of functions designed to do those latter two steps. In
this case, that pair is renderTable({}) on the server side
and tableOutput() on the UI side. [Notice that most Shiny
functions have camelCase names.]
Let’s use these two functions to add a basic table of the
gapminder data set to our app’s UI:
R
##Place this code INSIDE your app's server function INSIDE your server.R file!

###TABLE
output$basic_table = renderTable({
  gap #<--OR WHATEVER YOU NAMED THIS DATA SET OBJECT IN YOUR GLOBAL.R
})
Above, we told R to render an “HTML-ized” version of
the raw gapminder data frame. Because we wanted to render the raw data
set with no modifications, we put just the data frame’s name inside
renderTable{})’s braces. If we had wanted to do any
operations on this data set first (such as filtering it or adding
columns to it), though, we could have those operations using normal R
code inside those braces. So long as it’s a table-like object, the last
thing produced inside the braces is what gets rendered (placing anything
else last will trigger an error).
Once we have a rendered, HTML-ized table on the server side, how do we pass it from the server to the UI? Remember that users only see what the server instructs a user’s browser to build in the UI, so we must tell R to “hand over” this rendered table to the UI somehow…
Last lesson, recall that the app creates an object called
output when the app boots up. Passing rendered elements
from the server to the UI is output’s job. If an app is
like a restaurant, then rendering is the process of “cooking” elements
in the kitchen, and output is the waiter that brings
finished elements into the dining room where users/customers can
experience them.
For this to work, though, we need to give the rendered element a
nickname (an outputId). Then, we use that
outputId to “stick” the rendered element to
output using the $ operator. Here, the
outputId we set was basic_table.
Now, we just need to code the equivalent of “dropping our prepared
element off at the right table.” We tell the app where to place
the element with our placement of the tableOutput() call in
our UI:
R
##This code should **replace** the "main" fluidRow() contained within the BODY section of your ui.R file!

##... other UI code...

fluidRow(
  ###SIDEBAR CELL
  column(width = 4),
  ###MAIN PANEL CELL
  column(width = 8,
         tableOutput("basic_table")#<--PUTTING OUR RENDERED TABLE IN OUR "MAIN PANEL" CELL USING tableOutput(), WITH THE outputId OF THE RENDERED PRODUCT AS INPUT.
         )
),

##... other UI code...
Here, we’ve placed our outputted table inside the “main panel” cell.
Why do we need to use our outputId as the input for
tableOutput()? Wouldn’t it be enough to place an empty
tableOutput() call here? Well, a single app might render
and display many different tables. How would the app know which
table should be displayed where, if all it had to go on was
where tableOutput() calls were?
This ambiguity is cleared up by specifying the outputId
of the specific table we want displayed in a specific
location. In our restaurant analogy, the outputId is like
the order ticket the waiter filled out when a table ordered food.
output (our “waiter”) then uses that code later to figure
out which prepared food belongs to which tables.
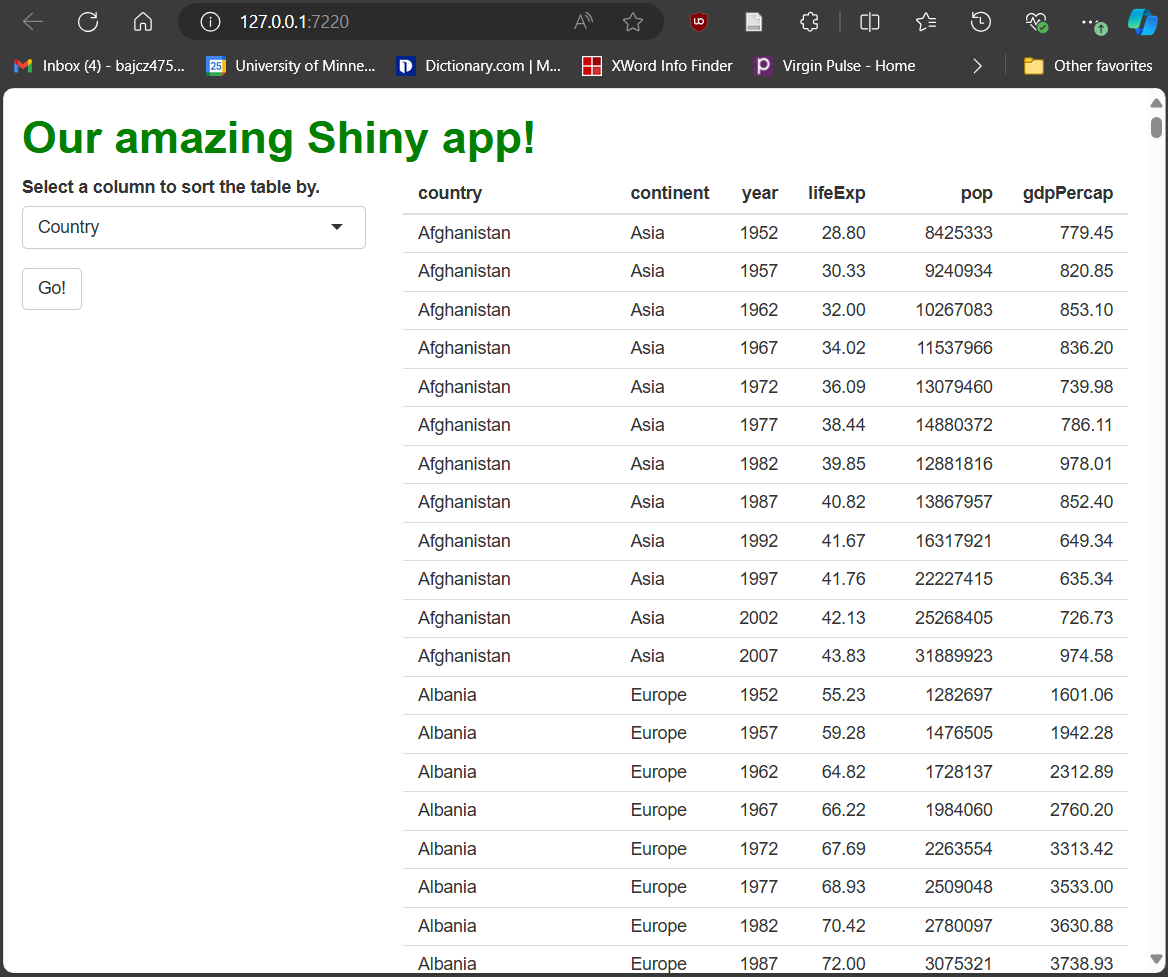
If we run the app now, it should look like this:
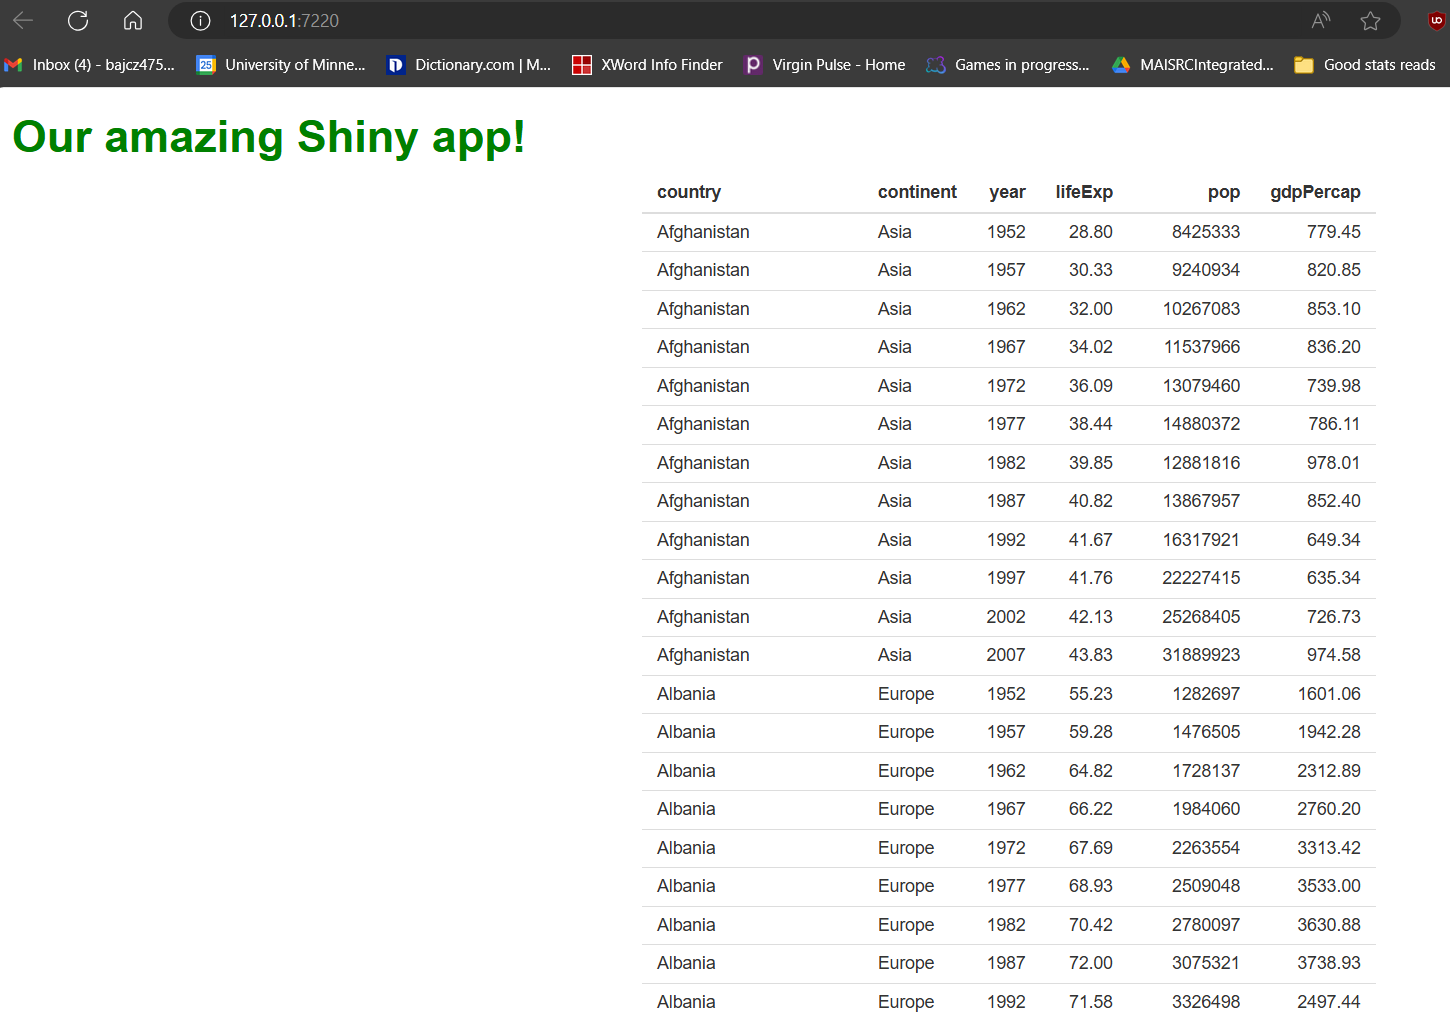
Our table is cool! But not terribly exciting…it looks a little drab (and long!), and users can’t actually do anything with it except look at it. The first problem we’ll fix later by swapping it for a fancier one. However, we can fix the second problem now.
Giving your users input
The value of a Shiny app can be measured in terms of how much it lets users do. To enable meaningful user interactions, we can add widgets. A widget is any element users can interact with and thus provide data to the app that it could use to respond in some way. In web development, user actions a webpage can watch for are called events; responding to an event (or choosing to not respond!) is called event handling.
Let’s start by adding an input widget to our UI so
that new events are possible. Specifically, let’s add a
selectInput() to our “sidebar.” This will produce a
“drop-down menu”-style element that allows users to pick a choice from a
pre-defined list. We’ll populate the list with the column names from the
gapminder data set:
R
##This code should **replace** the "sidebar" cell contained within the main fluidRow() of your ui.R file!

##... other UI code...

###SIDEBAR CELL
    column(
      width = 4,
      ##ADDING A DROP-DOWN MENU WIDGET TO THE SIDEBAR.
      selectInput(
        inputId = "sorted_column",
        label = "Select a column to sort the table by.",
        choices = names(gap) #<--OR WHATEVER YOU NAMED THIS OBJECT IN GLOBAL.R
      )
    ),

##... other UI code...
Notice we provided selectInput() three inputs:
An
inputIdis both anidfor CSS as well as a nickname the app uses to pass this widget’s current value from the UI to the server. We’ll see how that works in a minute.The text we provide to
labelwill accompany the widget in the UI and, usually, should explain to the user what the widget does (when it isn’t obvious).For
choices, we provide a vector of values that’ll be the options in our drop-down menu.
While there are a few variations, most Shiny input widgets work a lot
like selectInput(), so it’s a good first example.
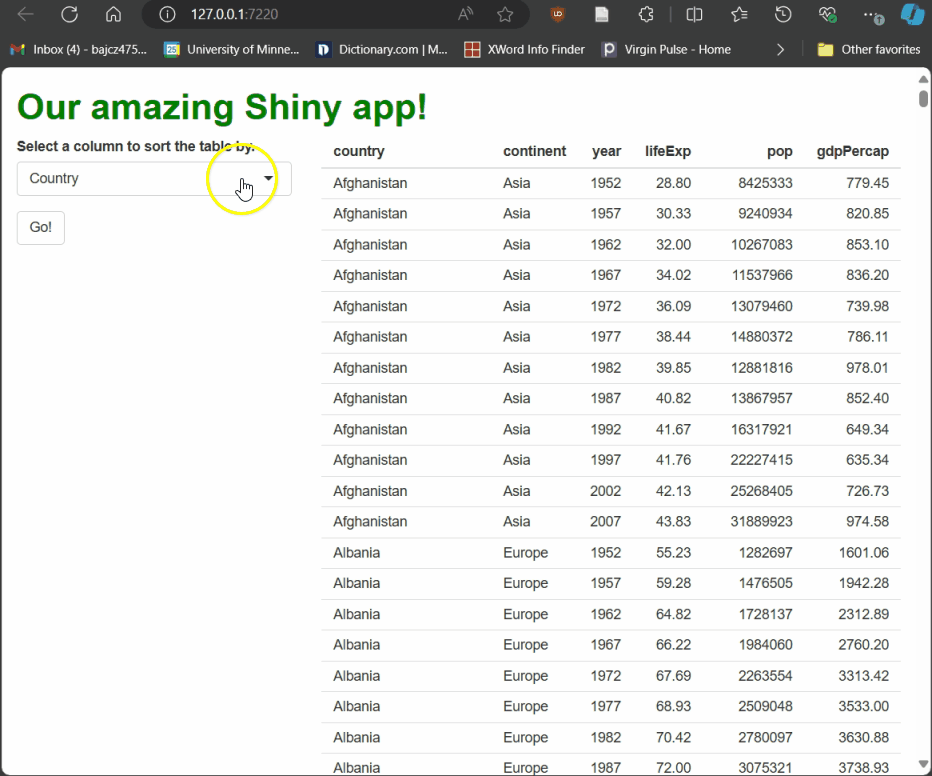
Now, our app should look like this:
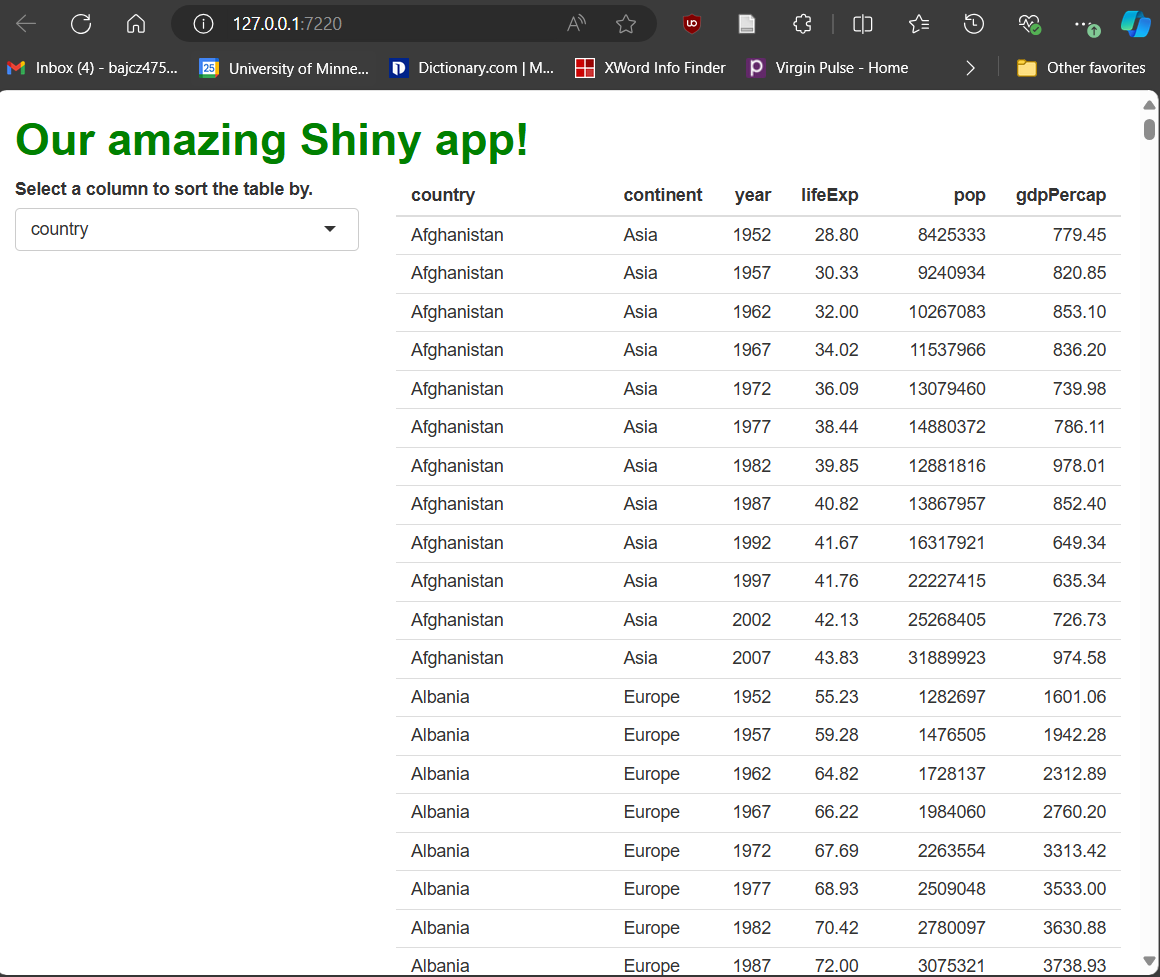
Very nice!
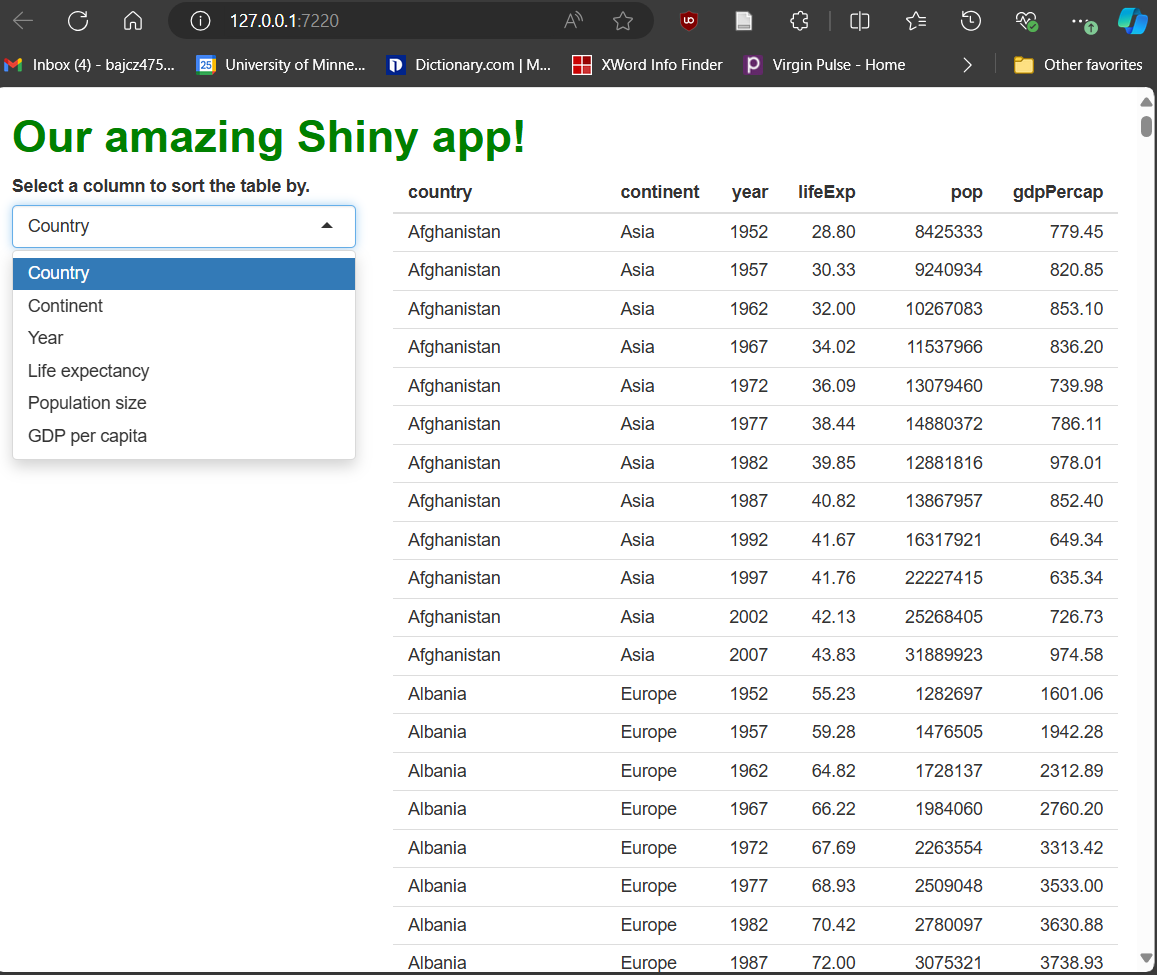
…Except for two things. First, the choices in the drop-down menu are…ugly. Some are abbreviations that lack spaces between words and some also lack capital letters.
How could we fix this? Well, we could rename the columns in the data set, but while column names in R can contain spaces, at best, it’s annoying. Plus, longer and more complex names require more typing.
Instead, we can provide a named vector to
choices. The names we give (left of the =)
will be displayed in the drop-down menu, whereas the original column
names (right of the =) will be retained internally for the
app to use in operations:
R
##This code should **replace** the "sidebar" cell contained within the main fluidRow() of your ui.R file!

##... other UI code...

###SIDEBAR CELL
    column(
      width = 4,
      selectInput(
        inputId = "sorted_column",
        label = "Select a column to sort the table by.",
        choices = c(
          #BY USING A NAMED VECTOR, WE CAN HAVE HUMAN-READABLE CHOICES AND COMPUTER-READABLE VALUES. TYPE CAREFULLY HERE!
          "Country" = "country",
          "Continent" = "continent",
          "Year" = "year",
          "Life expectancy" = "lifeExp",
          "Population size" = "pop",
          "GDP per capita" = "gdpPercap"
        )
      )
    ),

##... other UI code...
With that change made, our drop-down menu widget is looking much cleaner!
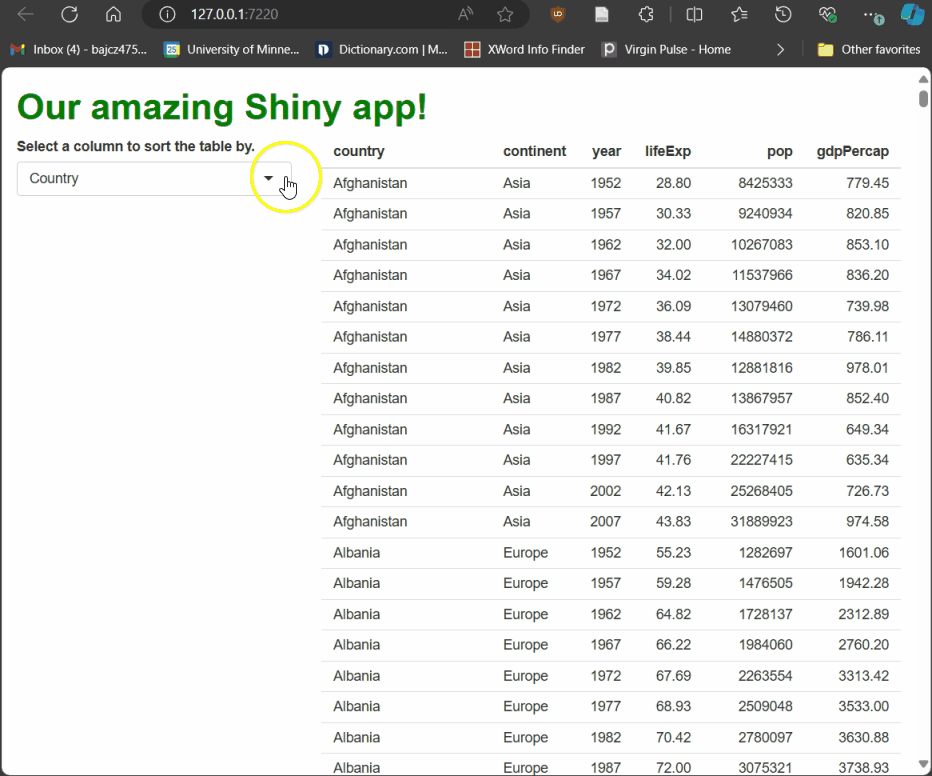
The more serious issue is that fiddling with the drop-down doesn’t do anything…yet. We’ve created something a user can interact with, triggering events, but we haven’t told the app how to handle them yet.
R’ll handle that
Let’s do that next. We’ll give users the ability to re-sort the table by the column they’ve selected using our drop-down widget. This requires only a modest adjustment to our server code:
R
##This code should **replace** the renderTable({}) call in your server.R file!

###BASIC GAPMINDER TABLE
output$basic_table = renderTable({

  gap %>%
    #USE dplyr's arrange() TO SORT BY THE PICKED COLUMN.
    arrange(!!sym(input$sorted_column)) #!! (PRONOUNCED "BANG-BANG") AND sym() ARE dplyr HACKS HERE, NOT R SHINY THINGS. DON'T WORRY ABOUT WHAT THEY DO.
})
Run the app and try it! As you select different columns using the drop-down menu, the table rebuilds, sorted by the column you’ve picked:
Earlier, we met output, which passes rendered elements
from the server to the UI. Here, we meet input, which
passes event data from the UI to the server. Here,
input is passing the current value of the widget
with the inputId of sorted_column over to the
server every time that value changes. Our server code can use that value
in operations, such as deciding how to sort the data in our rendered
table.
More importantly, though, Shiny knows that
input$sorted_column’s value could change at any
moment. Objects with values that could change as a result of events
are called reactive objects—at any time, they could
change in reaction to something the user did.
Because we’ve used input$sorted_column in some of our
server code, and because R knows that input$sorted_column’s
value could change at any time, Shiny knows to be watching for
such changes. Whenever it spots one, it’ll run any code that includes
input$sorted_column again. The logic for this
holds up: If input$sorted_column has changed, any outputs
produced using its previous value as an input may now be “outdated,” so
re-running the associated code and producing new outputs makes
sense!
Because the code inside renderTable({}) contains
input$sorted_column, that code will re-run every time
input$sorted_column changes, which happens every time the
user selects a new column from the drop-down menu. We’re successfully
handling events triggered by our
user’s interactions with our input widget!
Reactivity
There is just one small but important technical detail: Shiny can’t watch for changes in reactive objects everywhere—it can only do so within reactive contexts. A reactive context is a code block that R knows to watch for changes because reactive objects can be there and those might change. It makes sense that we can only put these kinds of “changeable” objects inside code blocks that R knows might contain such objects!
Challenge
Try it: Pause here to prove the previous point. Copy
input$sorted_column and paste it anywhere inside
your server function but outside of
renderTable({})’s braces. Then, run your app. It should
immediately crash! Note the R error that prints in your
R Console when it does; rephrase that error messages in your own
words.
You’ll get an error that looks like this:Error in $: Can't access reactive value 'sorted_column' outside of reactive consumer. ℹ Do you need to wrap inside reactive() or observe()?
This error notes that input$sorted_column is a
reactive object (R is calling it a reactive value; the
distinction isn’t important) and that you’ve tried to reference it
outside of a reactive context (R is calling it a reactive consumer,
which is also not an important distinction). R is not prepared to be
watching for such an object in the place we’ve put it.
How do we recognize reactive contexts so we know where we can and
can’t put entities like input$sorted_column? Generally
speaking, when an R Shiny server-side function takes, as an input,
an expression bounded by braces ( {} ),
that expression becomes a reactive context (this isn’t strictly
true, as we’ll soon see, but it’s a good first assumption).
Maybe you’ve noticed the curly braces inside
renderTable({}) and wondered what they’re for? The main
input to every render*() function is an
expression for creating a reactive
context!
That means R assumes that every complex element we render
server-side might need to be re-rendered because the user
changes something. The code we provide to renderTable({})
is treated as a general set of instructions for how to handle
changing values of input$sorted_column, no matter what new
value gets picked or when. And the solution Shiny uses in those cases
will always be “re-run this expression.”
How R Shiny differs from “normal R”
You’re hopefully realizing that coding in R Shiny (on both the UI and server sides) is different from coding in “normal R” in some key ways.
For many regular R users, the “nestedness” of UI code probably feels strange (it should—we’re really writing thinly veiled HTML!). Meanwhile, server-side, having to anticipate ways users might interact with our app and then code generalized instructions for how the app should respond, no matter when or under what circumstances, also probably feels strange.
It should—R Shiny server code is not like normal R code! In fact, it’s an entirely different paradigm of programming than the one you might be most familiar with. Normal R code is generally executed imperatively. That is, it is run from the first command provided to the last one, as fast as possible, as soon as we (the user) hit “run.”
Server-side Shiny code, meanwhile, is executed declaratively. That is, it generally runs once when the app starts up, but, after that, it never runs again unless and until it is triggered to run by one or more specific events.
[Caveat: The above is true when R is deciding which reactive contexts to run and when; however, the R code within those contexts still runs imperatively, once the reactive context it’s within is chosen to run.]
These two different paradigms can be compared with an analogy: Imagine you are in a sandwich shop ordering a sandwich. You probably expect the employees to begin making your sandwich as soon after you’ve place your order as possible, based on particulars you’ve specified (what you want to order). In that analogy, the relationship between you and the shop is imperative; you gave a “command” and the sandwich shop “executed” that command as quickly as it could based on the inputs you’ve provided.
Meanwhile, the relationship between the shop’s manager and their employees is declarative. The manager can’t know which customers will come in on a given day, when those customers will show up, or which sandwiches they’ll order. So, they can’t give their employees precise “commands” and specific instructions of when to execute them or in what order. Instead, they have to tell their employees to “watch for customers” and, when those customers arrive and place orders, they should use a generalized set of guidelines to handle whatever orders have been placed with whatever inputs were provided.
As web developers, our relationship with our users is similar. We can’t know who will show up and what exactly they might decide to do and when. However, we can anticipate actions they might be likely to take (in fact, we can steer them towards specific actions with our design!) and then give the app generalized enough instructions that it can take care of all those different requests whenever (or if ever) they occur.
Another way to think about this distinction between imperative evaluation in R and directive evaluation in R Shiny is that, in the former, you are the user, and you are present now, so R should strive to meet your needs immediately, and you can be highly precise about what those needs are and how they should be met. In the latter, though, your users are the visitors to your website, and even though you’re writing the code for your website now, its users won’t arrive until later. So, your code needs to let R know what it should do later on, when you’re not around, but your users are.
Discussion
Check for understanding: How does the code we’ve
written so far in our server.R file execute differently
than code we’d write in a traditional R script? How does the code inside
of renderTable({})’s braces differ from traditional R code
we might write?
Server-side R code is broken up into many commands that create reactive contexts, each of which is tasked with generating one or more complex UI elements and/or handling user actions. Unlike traditional R code, these reactive contexts execute not when we hit “run” but instead when a user performs a triggering action. So, they each might run many times, or once when the app starts and then never again.
Plus, reactive contexts will (re)-run based on user actions, not based on their placement within the file. So, your server-side will often run in an “order” very different than the “top-down” order we usually expect R code to run in.
Inside a reactive context, meanwhile, things are more traditional; code inside a reactive context will run just once, from top to bottom, as quickly as possible, as soon as that context is triggered to (re)run. However, the difference is that these contexts might contain reactive objects whose values might frequently change, so our code needs to be set up to accommodate any potential value they may take.
Buttoning this up
By this point, R now knows that:
Users might select new columns in our input widget (events),
It should watch out for any such events, specifically those affecting reactive objects (like
input$sorted_column) inside ofrenderTable({})’s reactive context, andIf any events occur, it should re-execute the code inside
renderTable({})’s braces, re-generating the table in line with the generalized instructions we’ve provided, including those that influence how the table is sorted.
In this circumstance (a simple table that users can adjust via just one input widget), this setup is probably fine.
However, imagine that users have access to several input widgets instead of one. If we used this same approach to handle events from all those inputs, a user adjusting any one input would trigger the table re-rendering process.
That might make our table undesirably reactive! Users often expect to have a say in when exactly an app changes states. Maybe they expect to be able to experiment with all available widgets to find the combination of selections they are most interested in. Maybe the table loads slowly, so users would prefer not to wait through the rebuilding process until they’re “ready.” Maybe some users just want to be “in control” because they’d find the updating process distracting when it happens not on their terms.
In any case, we can give users greater control by adding another
input widget: an actionButton().
R
##This code should **replace** the "sidebar" cell contained within the main fluidRow() of your ui.R file!

##... other UI code...

###SIDEBAR CELL
    column(
      width = 4,
      selectInput(
        inputId = "sorted_column",
        label = "Select a column to sort the table by.",
        choices = c(
          "Country" = "country",
          "Continent" = "continent",
          "Year" = "year",
          "Life expectancy" = "lifeExp",
          "Population size" = "pop",
          "GDP per capita" = "gdpPercap"
        )
      ),
      ##ADD AN actionButton(). PAY ATTENTION TO COMMAS/PARENTHESES AROUND THIS NEW CODE!
      actionButton(inputId = "go_button", label = "Go!")
    ),

##... other UI code...
The code we’ve added above adds a simple, button-style widget to our
app’s sidebar. It says Go! on it (label), and
it’s current value (a number equal to the number of times it’s been
pressed, or NULL if it hasn’t been pressed yet) will be
passed from the UI to the server via input$go_button.
Now, we need to tell R how to handle presses of our button (until then, pressing it won’t do anything!).
Here, we want the table to update only whenever the button
is pressed (i.e., whenever input$go_button’s value
changes). We also no longer want changes to
input$sorted_column to cause the table to update.
Here’s where we hit a snag: renderTable({})’s reactive
context is “indiscriminate;” any change in any
reactive object it contains will trigger the reactive context to rerun.
So, simply adding input$go_button to that reactive context
will not prevent changes in input$sorted_column
from triggering a rerun too. But we can’t just remove
input$sorted_column from the reactive context because,
then, we couldn’t use its current value to decide what column to sort by
when we the context does re-run.
Are we stuck? No. Thankfully, Shiny has a function for these kinds of
situations: isolate(). Wrapping any reactive object with
isolate() allows R to use that object’s current value to do
work, but that object loses its ability to trigger events in that
context.
Here’s how we can use isolate() to achieve the desired
outcome:
R
##This code should **replace** the renderTable({}) call contained within your server.R file!

output$basic_table = renderTable({

  #SIMPLY BY PLACING input$go_button ANYWHERE INSIDE THIS REACTIVE EXPRESSION (EVEN IF IT'S VALUE IS NOT USED IN ANY MEANINGFUL WAY), THIS REACTIVE CONTEXT WILL RE-RUN EVERY TIME input$go_button CHANGES.
  input$go_button

  #USING isolate() PREVENTS input$sorted_column FROM TRIGGERING EVENTS, BUT STILL ALLOWS US TO USE ITS CURRENT VALUE TO DO WORK.
  gap %>%
    arrange(!!sym(isolate(input$sorted_column)))

})
Now, when users fiddle with the drop-down widget, nothing happens…until they press the button. Then, and only then, does the table re-render, using their most recent selection in the drop-down as an input to that process.
Being observant
This approach works just fine in this simplistic situation. It can get unwieldy, however, if you have many inputs you’d need to find and isolate inside a complex reactive context.
For situations in which you want your app to respond in a
specific way only when a single specific
reactive object changes, especially when the response involves a bunch
of other reactive objects you don’t want to trigger events, we
can make our event handling more precise using
observeEvent({},{}):
R
##This code should **replace** the renderTable({}) call contained within your server.R file!

#FIRST, WE REDUCE OUR renderTable({}) CALL BACK TO ITS BASIC FORM SO IT PRODUCE THE DEFAULT VERSION OF OUR TABLE WHEN THE APP STARTS. THIS CODE WILL NEVER RUN AGAIN THEREAFTER BECAUSE IT CONTAINS NO REACTIVE OBJECTS.
output$basic_table = renderTable({
  gap
})

#NEXT, WE CREATE AN OBSERVER TO WATCH FOR EVENTS AND TO UPDATE THAT DEFAULT TABLE.
#observeEvent({},{}) TAKES TWO EXPRESSIONS. IT WATCHES THE FIRST FOR EVENTS AND, WHEN IT SPOTS ONE, RESPONDS BY RUNNING THE SECOND.
#SO, ONLY THE **FIRST** EXPRESSION IS REACTIVE, BUT ONLY THE **SECOND** EVER RUNS!
observeEvent(input$go_button, {

  output$basic_table = renderTable({
  gap %>%
    arrange(!!sym(input$sorted_column)) #NO NEED FOR isolate() ANY LONGER
  })

})
If you restart your app having made the adjustments above to your server code, you will be able to confirm that the app works exactly the same as before, showing that both approaches work to accomplish the same goal.
Note that we wrote observeEvent({},{}) with two
sets of braces. That’s because we give it, as inputs, two
expressions. These have a particular relationship:
R watches only the first for events (it’s the only reactive expression of the two).
-
R only ever executes the second expression, and only due to changes in the first).
- In a sense, it’s like the entire second expression has been
isolate()d, and the entire first expression has been “muted” in that it can’t produce outputs!
- In a sense, it’s like the entire second expression has been
So, observeEvent({},{}) is the equivalent of telling R
“if [first expression] changes, do [second expression],” a level of
precision in our event handling that we very often want! It’s for this
reason I use observeEvent({},{} often in my apps—they make
an app’s responses to user actions much more predictable than other
approaches.
Totally tabular
We now have all the conceptual tools to build a really cool app! In the next lesson, we’ll replace our current table with a cooler one, and we’ll add map and graph widgets too. To keep all this new content organized, let’s add tabs to our main panel, one for each complex interactive feature.
We can do this using the Shiny functions tabsetPanel(),
which creates a box to hold all the tabs, and tabPanel(),
which creates a box for the contents of one tab:
R
##This code should **replace** the content of the "main panel" cell within the BODY section of your ui.R file!

##... other UI code...

###MAIN PANEL CELL
##NEST UI ELEMENTS HERE **CAREFULLY**!
    column(width = 8,
     tabsetPanel(
      ###TABLE TAB
      tabPanel(title = "Table",
               tableOutput("basic_table")),#RELOCATE THE TABLE INTO THIS NEW TAB.
      ###MAP TAB
      tabPanel(title = "Map"),
      ###GRAPH TAB
      tabPanel(title = "Graph")
     )
    ),

##... other UI code...
Now, if we look at our app, we’ll see we have three tabs in our main
panel area, with titles in their tab headings that we
provided in our UI code:
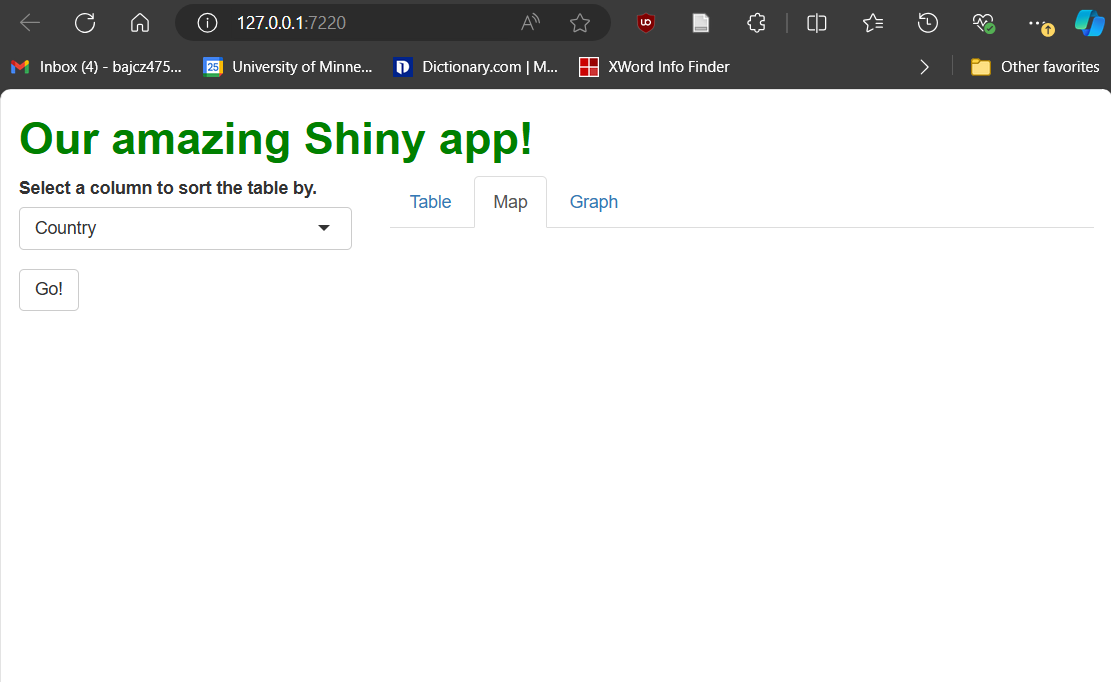
We can swap between tabs using each tab panel’s tab (the terminology here is awkward!), just like in a browser. The second and third tab panels are currently empty, but not for long! We’ll add new features to them in the next lesson.
Discussion
Imagine you have two observers that are watching the same reactive object such that, when that reactive object changes, both observers should begin to execute. What do you think will happen?
In complex applications, the scenario described here is surprisingly common, and it can actually be a problem!
In Shiny, both observers would invalidate, meaning they have both been “scheduled” to re-run. Shiny then selects to re-run one of them first (somewhat arbitrarily) and allows it to finish completely before allowing the next one to re-run. Shiny does not (by default) allow observers to run at the same time (“in parallel”), so they will always run in some sequence instead.
If the two observers have completely independent roles, this circumstance is maybe fine. However, if the observers depend upon one another (e.g., observer 1 is meant to use up-to-date outputs from observer 2’s operations), then the order in which the observers run matters. If observer 1 runs first, it may use outdated inputs.
When the exact order in which observers )or other reactive contexts) re-run matters, developers refer to this as a race condition, as though the two reactive contexts are “racing” each other. Race conditions are a common source of bugs in directive evaluation contexts.
While it’s best to design apps such that observers are independent or
don’t need to watch the same reactive objects, it’s sometimes
unavoidable. In those instances, observeEvent({},{})’s
priority parameter can be used—R will use the values
specified to priority to decide the order “racing”
observers should execute in-.
Key Points
- Complex UI elements, like tables, first need to be
rendered server-side using a
render*({})function and then placed within our UI using an*Output()function. - Rendered entities are passed from the server to the UI via the
outputobject using theoutputIds we provided them when we rendered them. -
Input widgets are UI elements that allow users to
interact with our app in pre-defined and familiar ways. The current
values of these widgets are passed from the UI to the server via the
inputobject using theinputIds we provided them when we created them. - R knows to watch reactive objects (like those
attached to
input) for changes. Any such changes are events. Event handling is coding how the app should respond to an event. - The primary way Shiny handles events is by re-running any
reactive contexts containing the reactive object(s)
that just changed (unless those objects have been
isolate()d, in which case they can’t trigger events but they can be used in operations). - Server-side, reactive contexts are triggered to run directively (when a precipitating event occurs), not imperatively (when a coder hits “run”). They might run in any order, many times, or never—it all depends on what the user does.
- However, once a reactive context begins executing, its contents are executed imperatively, like “normal,” until they complete (even if that takes a long time!), during which time the app will be unresponsive.
-
Observers (like
observeEvent({},{})) allow for more precise event-handling;observeEvent({},{})s only rerun their second expression and only in response to events that occur in their first expression, so they enable precise “If X, then Y” event handling. -
tabPanel()andtabsetPanel()create a “tabular layout,” dividing one UI space into several, only one of which is visible at a time.